
How to Make Merry Nail Art Without Stepping in a Salon
The holiday season is the perfect time to try out festive nail designs that go with the cheer and sparkle of the occasion. The best part? You don’t need a salon visit to achieve beautiful, professional-looking nails. With the right tools, techniques, and creativity, you can create stunning holiday nail art from the comfort of your home. Here’s a step-by-step guide to get you started.
Gather Your Supplies
To make festive nail designs at home, a few essentials are needed.
Nail polish color: Select shades such as red, green, gold, silver, white, or glitter for a holiday look.
Base coat and top coat: These ensure a smooth application and long-lasting finish.
Nail art tools: Dotting tools, striping brushes, or toothpicks can be used for intricate details.
Nail stickers or decals: These are great for simple, detailed designs.
Tape and stencils: for sharp edges and patterns.
Cleanup tools: cotton swabs and nail polish remover to fix mistakes. Step 2: Prep Your Nails
Step 2: Prep Your Nails
Prep Your Nails
Before diving into nail art, proper nail preparation ensures your designs last longer.
Clean your nails: Remove old polish and clean your nails with soap and water.
Shape and file: Trim your nails to your desired length and shape, whether square, almond, or stiletto.
Buff the surface: Smoothen out ridges with a nail buffer.
Apply a base coat. This will protect your nails and prevent staining.
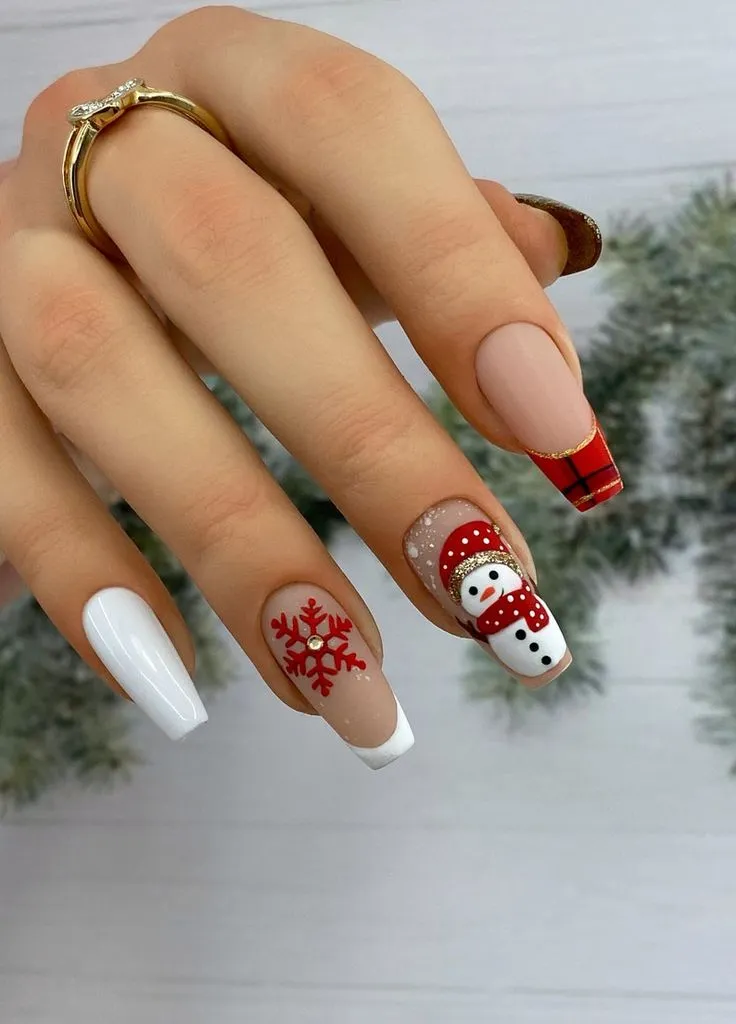
Pick Your Design
Here are some easy-to-create festive nail designs:
1. Candy cane strips:
Apply a white base color.
Use tape or a striping brush to create diagonal red stripes.
2. Glitter Gradient:
Paint your nails with a solid base color (like red or green).
Dab glitter polish near the tips and blend downward for a gradient effect.
3. Snowflakes:
Start with a blue or white base.
Using a thin brush or toothpick, draw snowflakes with white polish.
Add small rhinestones for extra sparkle.
4. Christmas Tree Accent Nail
Paint one nail with a green base.
Use a striping brush or tape to create a triangular tree shape.
Decorate with dots of different colors for ornaments.
5. Festive dots:
Paint your nails a solid color.
Use a dotting tool to create polka dots in contrasting holiday shades like red, green, and gold.
Step 4: Apply the Top Coat
After completing your design, seal it with a high-quality top coat. This step adds shine and protects your artwork from chipping.
Step 5: Cleanup and Care
Use a small brush or a cotton swab dipped in nail polish remover to clean up the edges.
Keep your nails hydrated by applying cuticle oil regularly.
Tips for Success
Practice makes perfect: If you are new to nail art, practice designs on a plastic sheet or press-on nails first.
Work with thin layers: Apply polish in thin layers to avoid smudging and ensure quicker drying.
Use quick-dry products: To save time, invest in a quick-dry top coat or drying drops.
Do I need expensive tools for nail art?
Not really. One can produce many designs by just using what is available in a home: toothpicks, tape, or bobby pins, for example. But making an investment in basic nail art tools does make a difference.
How can I make my nail designs last longer?
This is basically about proper preparation of nails, thin application of the polish, and a top coat of the best quality. Avoid exposing your nails to water for long periods of time.
If I mess up in the process of designing?
Everyone messes up sometimes. Use a small brush or a cotton swab with nail polish remover to correct mistakes without having to redo the whole design.
Can I still do festive designs on shorter nails?
Of course! There are so many designs, such as polka dots and glitter gradients, that work just great on shorter nails.
DIY Nail Art Cons
Time-consuming: Creating intricate designs can take longer than expected, especially for beginners.
Limited tools: Without professional tools, some designs may be harder to achieve.
Skill level: More complex designs require practice and precision.
Durability: DIY nail art may not last as long as salon-applied designs, especially without the use of gel polish or professional-grade products.
Creating festive nail designs at home is a great way to celebrate the holidays as well as save money you might have otherwise spent visiting a salon. It just requires some time and effort to master it, and then it will be worth doing it. If you have the tools, techniques, and inspiration, you can express the holiday spirit in your best nail art. So come and embrace DIY joy and creativity this holiday season!